WordPress is a multipurpose website builder used to promote whatever the webmaster or business owner wants their audience to see. The site is primarily used as a marketing tool, helpful to both small-time content creators and large corporations alike. According to WordPress, 39% of all pages on the Internet are built using their CMS platform.So, how does one exactly publish content using WordPress? It’s fairly simple.
WordPress is designed around accessibility, and makes it easy for anyone to publish content online.
This step-by-step guide will cover the basics of adding content to your website, as well as answer some commonly asked questions surrounding the publishing process.
Posts vs. Pages
Before you begin publishing anything, it’s important to note the two main types of WordPress content: posts and pages.
Posts are mainly used in blogging, which is useful if that is the main focus of your site. They are organized in reverse chronological order, meaning that newer posts will appear at the top of the page and older ones toward the bottom.
Pages are static pieces of content which display more pertinent information–your contact information, an about page, and any other content which wouldn’t otherwise work as a blog post. Unlike posts, pages don’t necessarily share a single part of the site, and newer pages won’t supersede older ones upon publication.
How To Create A Blog Post
Follow these steps to publish a blog post:
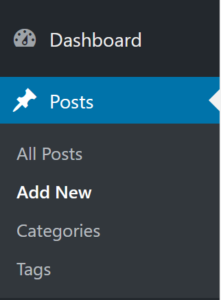
- In the Posts category of the WordPress dashboard, click on Add New.
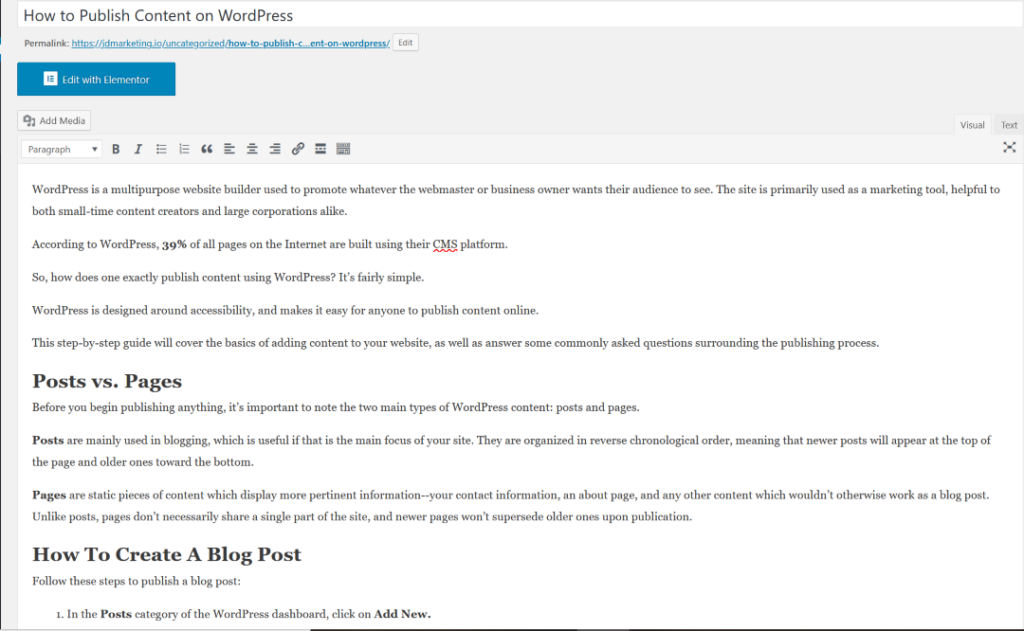
You will then be redirected to the Block Editor, the primary tool for writing and editing content. You can begin writing your content now, adding any relevant media (links, images, videos, etc.)
- If you want to streamline the editing process, you can use page builders like Elementor. These can be found above the standard editor and will provide you with a real-time preview of your post.
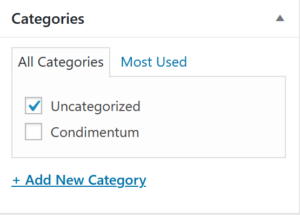
3. In the sidebar on the right side of the screen, click on Categories. By default, the post is marked as Uncategorized: to make your post appear under the site’s blog page, simply check off the Blog option (if you have a “Blog” category enabled).
Set a featured image for your post. A relevant image not only gives readers a preview of the content you’re writing about, but also makes it easier for your post to appear in search results.
Once you have finished writing your post, it’s time to focus on SEO. SEO (Search Engine Optimization) consists of several components that will help your post appear in search results online.
To fully take advantage of SEO, you need to include the following:
- The title tag is the title your page will have in a search result. Be sure to include the title of your post and a separator, then either the name of your website or a relevant phrase which will catch the attention of your readers.
- The slug is the URL of your post. This is as simple as making it the title of your post, then placing a hyphen between each word. If necessary, shorten the title in your slug so only relevant words are included.
- If you enable certain plugins, you can include a table of contents to your post. This will categorize the content of a post by heading or subheading, and increases your chances of the headers/subheaders appearing in search results. To add one, simply click on the checkbox asking you to add the table, then check off the subsequent boxes based on which headings you want to use. For more information, click here.
How to Create a Page
The process of adding a new page to your site is similar to the steps taken when uploading a post.
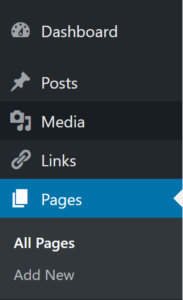
- In the Pages category of the WordPress dashboard, click on Add New.
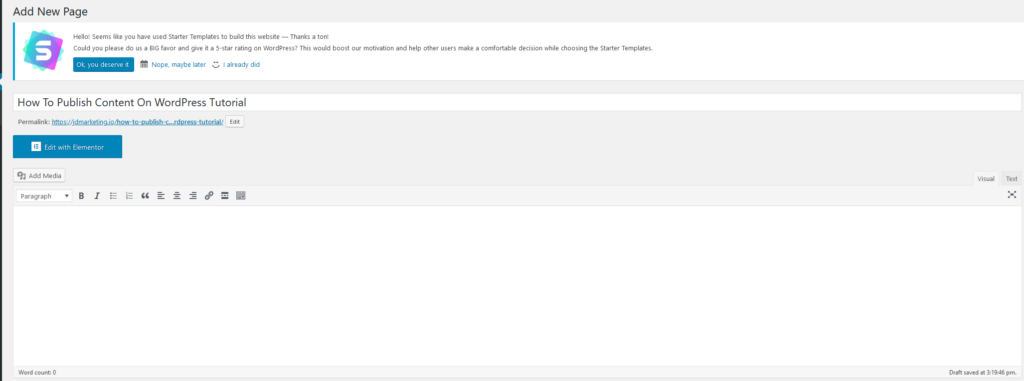
You will then be redirected to the Page Editor. Add your content into the box provided, and click on Add Media to attach any images you want to include.
3. Choose a Parent Category for your page, if needed.
4.Once you are confident that your page is completed, hit Publish.
Adding Media
Images, video clips, and other media are important parts of any WordPress post or page.
They offer a visual element to the text, can offer a break between paragraphs, and may even help boost the SEO of your page.
To add an image to a post or page:
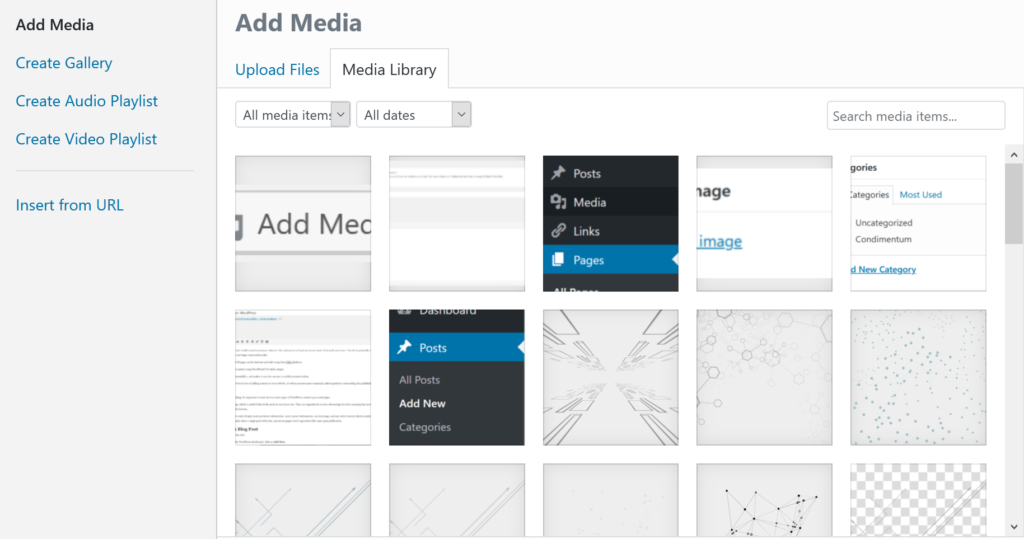
- Click on Add Media.
You will be directed to an image gallery. This gallery will save any and all images uploaded to it.
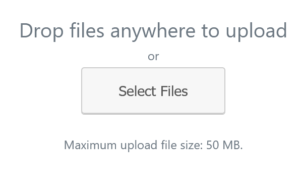
3. Click on Upload Files, then select the image you wish to upload. Please note that WordPress will only accept media files that are 50 mb or less in size.
4. Once the image is uploaded, you can resize, angle, and crop it however you see fit. Once all your adjustments have been made, hit the Back button to return to the gallery.
5. Click Insert Media Into Post to add your image to your post or page.
Commonly Asked WordPress Questions
How To Save In WordPress Without Publishing
So, you’ve finished drafting up a blog post or page. You proofread everything 10 times over, you added any relevant images or videos, and you can’t think of much else left to add.
But you still feel like something is missing.
It could be that you’re not as confident in one section as you are the others. Maybe you want to think of any more ideas before publishing. Or perhaps life gets in the way, as it often does, and you need to hold off on publication for just a while longer.
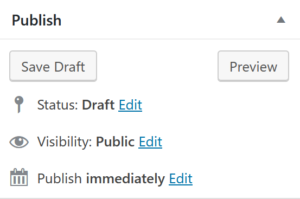
If you want to save your post as a draft, simply click the Save Draft button in the post editor. This will save all your current work, but not publish it.
You’re then free to continue editing it whenever you like, however you like, until the post or page is satisfactory to you.
Does WordPress Save Automatically?
The phrase “save early, save often” is a creed upheld by almost every kind of writer. In an effort to safeguard your work from any unexpected interference, like a computer crashing or a power outage, most writers will save their work after every revision regardless of how much is added.
WordPress can help relieve some of the stress which comes with constant saving.
Like Microsoft Word and Google Docs, WordPress includes an autosave function. The site will automatically save your work a few seconds after your last edit. If something happens which causes you to lose your work, autosave will preserve everything up to the last “checkpoint.”
Of course, you’re still welcome to manually save your progress.
What Is The Best Time to Publish Articles on WordPress?
For a publisher, timing is everything. In order to maximize the amount of views a given post or page will receive, you’ll need to publish the content at just the right time.
For WordPress pages, research has shown that 11:00 am on Mondays is prime time for blog post viewership.
With the weekend over and the daily grind at work back in full force, most people choose to view something interesting during their breaks. This typically happens during the lunch hour, which in American work culture is between 11:30 AM and 1:00 PM.
Publishing content before people head off to lunch opens your content up to a wider audience than it would receive otherwise.
Can You Edit a Blog Post After Publishing?
Let’s say you published a blog post, but after publication you notice some errors or other areas which might be improved.
Maybe you caught a typo or two in the headers. Perhaps you did some more research afterward and want to include it in your post, or you found some images which are more relevant to the topic being discussed.
Whatever the case may be, it’s important enough to warrant an edit.
To edit a post, do the following steps:
- In the WordPress dashboard, click on All Posts.
- Locate the post that you want to edit, then click the Edit button. There are two types of editor to select from.
- The block editor is the current default WordPress editor. It allows you to select from 15 “blocks” of content which you can modify to the needs of your site.
- The classic editor was the default editor prior to the release of the block editor. It is more basic in its structure, and does not feature as many options for editing individual pieces of content as the block editor does.
Once you’re satisfied with your edits, hit the Update button in the top-right corner of your screen. This will save the edited version of your post and make it public.

 You will then be redirected to the Block Editor, the primary tool for writing and editing content. You can begin writing your content now, adding any relevant media (links, images, videos, etc.)
 Set a featured image for your post. A relevant image not only gives readers a preview of the content you’re writing about, but also makes it easier for your post to appear in search results.
 You will then be redirected to the Page Editor. Add your content into the box provided, and click on Add Media to attach any images you want to include.
 You will be directed to an image gallery. This gallery will save any and all images uploaded to it.